Showing posts with label Crafts. Show all posts

Tuesday, 14 June 2011

Litha soon, some some crafts we are doing

Wanting to rearrange our altar with some new items this year we went on the search of things that Littleun and I could make and do together. One of our must haves is the smell of orange. Those big round juicy fruits which look so much like the burning Sun and smell of freshness and summer hope are important to us. We came across the stones below which we liked. It gives Littleun something he can make and he can craft with messages on the base, allowing him both his own special offerings and a chance to practice his runes or oghams. It’s an American recipe so uses cups but we just used English cups and added a little here and there to get the dough the right consistency.

Orange Fragrance Stones


1-1/2 cups flour

1/4 cup salt

1/4 tsp cornstarch

2/3 cup boiling water

1 tbls. Fragrance (orange in this case) oil

Colorant of your choice


Mix all dry ingredients. Heat water in a Pyrex cup in the microwave or on the stove. Add the f/o and the colour to the water. Stir water mixture into flour mixture. Mix as best you can and then knead the dough with your hands. At this point you just want it to look like pie or cookie dough. Roll it out about a quarter of an inch thick. Cut into shapes or use cookie cutters. Another option is to stamp the flat shapes. Let the dough stones dry. They get hard as rocks and will last for months.

We are looking forward to Litha, last year we spent it in France but this year it will be here in England on the beach with our friends.

Sunday, 5 December 2010

Stained Glass Ginger Biscuits


Ok it’s still rubbish weather wise here so have warmed the house with the smell of ginger. We often make goodies as gifts for friends at Yule and this year is no different. We have hampers ready with yummy things like our chutney from the summer and the apple schnapps soon ready to be poured into individual bottles. But one of the other things we like making are decorations and if that can be combined with food all the better.

We have put together some bits and bobs that the Littleuns can make (with a bit of help from the adults) and our first foody one are these delicious biscuits. Make them, hang them or just eat them.

To make you will need:

Cookie/biscuit cutters, we used stars, bells and house. Two of each is helpful, one smaller than the other.
Baking sheet.
Greaseproof paper

For the biscuits:
350g/12oz plain flour, extra for dusting
1tsp Bicarbonate of soda
½tsp salt
2tsp ground ginger
100g/3½oz butter
175g/6oz soft brown sugar
1 free-range egg, beaten
4tbsp golden syrup
Packet of fruit flavoured boiled sweets, different colours.
To decorate:
Tube of readymade white icing
Narrow ribbon
Ice sugar/dust

Method:

Preheat the oven to 180c/350f/Gas 4
For the biscuits mix the flour bicarbonate of soda salt and ginger together in a bowl.
Rub in the butter until the mixture resembles fine breadcrumbs, and then stir in the sugar.
In another bowl, beat together the egg and golden syrup, pour this mixture into the flour mixture and mix to make a smooth dough, kneading lightly with your hands.
Crush the sweets in a bag using a rolling pin.
Roll out the dough on a floured work top to about 5mm/¼inch thick, and then cut into the shapes chosen. Transfer the biscuits to the baking sheet lined with the paper.
Cut out the centre of each biscuit making sure you leave a good edge all around the biscuits, completely fill the hole in each biscuit with broken sweets.
Make a hole at the top of each biscuit so that you can later thread the ribbon through. Bake for 10-12 mins or until golden brown.
Remove biscuits from oven and whilst they are still warm check that the holes are still there if not gently re-make. Leave on tray until cooled. Once cooled pipe icing in patterns wanted around the biscuits, you can dip in the ice dust if you want a snow-ish feel to it. Thread ribbon and hang.

Saturday, 4 December 2010

Snowflakes for littleuns

Well our snow was there when we went to bed, all 1½foot deeps worth and when we woke up this morning it had all gone and was replaced with rain, lots of it. Littleun was a bit upset so we decided to make some of our Yule flakes ready to go on our tree and windows. If you would like to make some, this is how we did it.

You will need:

White paper or card,
Scissors,
Glitter,
Glue,
Sequins,
Coloured tissue paper,
anything pretty and sparkly basically


Draw around a circle object. Cut out the circle you have drawn, fold it in half, then half again. Using a pair of scissors cut out little shapes from the paper.

Cut out a circle of the tissue paper, putting dots of the glue onto the back of the snowflake push the tissue paper onto it.

Decorate the front of the snowflake as you wish, stick on sequins or use glitter etc.

When finished tape or white-tac it to your windows or hang on tree.

Sorry about the naff quality photos, am having problems with both the camera and uploading to blogger :o/

Saturday, 2 October 2010

Samhain/Hallowe’en Parties, What do you wear?

Littleun has been invited to a friend’s birthday party and as it is the day before Samhain his friends mum has gone with Hallowe’en as a theme for it. Well looking at his fancy dress box and the fact he seems to have turned into a giant overnight none of it is going to fit him. Unfortunately having a few financial issues at the moment means that I am not capable of buying some of those fantastic outfits you see in the stores so together we are going to make one. And like a few years previous Littleun wants to be a skeleton.

from a couple of years ago

We used:
Some white clothing paint
Paintbrushes
Tape
Newspaper
Old Black long sleeved t-shirt, leggings, socks and gloves

Put clothing on Littleun so that you can mark the elbows and knees with tape and mark the middle of the t-shirt at the bottom vertically.
Take of the clothes and lay flat. Roll up the newspapers and stuff the arms and body of the t-shirt.
Using the paint on bones shapes, don’t worry too much about being symmetrical.
Stuff the leggings and repeat painting.
For the hands paint smaller little bones on each finger of the glove and a bigger filled semi-circle on the area which covers the top of the hand.
With the socks we found it easier to put a small food bag onto his feet first then put the sock on, stopped the foot getting covered in paint.

When all done follow paint instructions for curing the clothing.
Paint up face and have a fun time.

Saturday, 25 September 2010

Seed box gifts

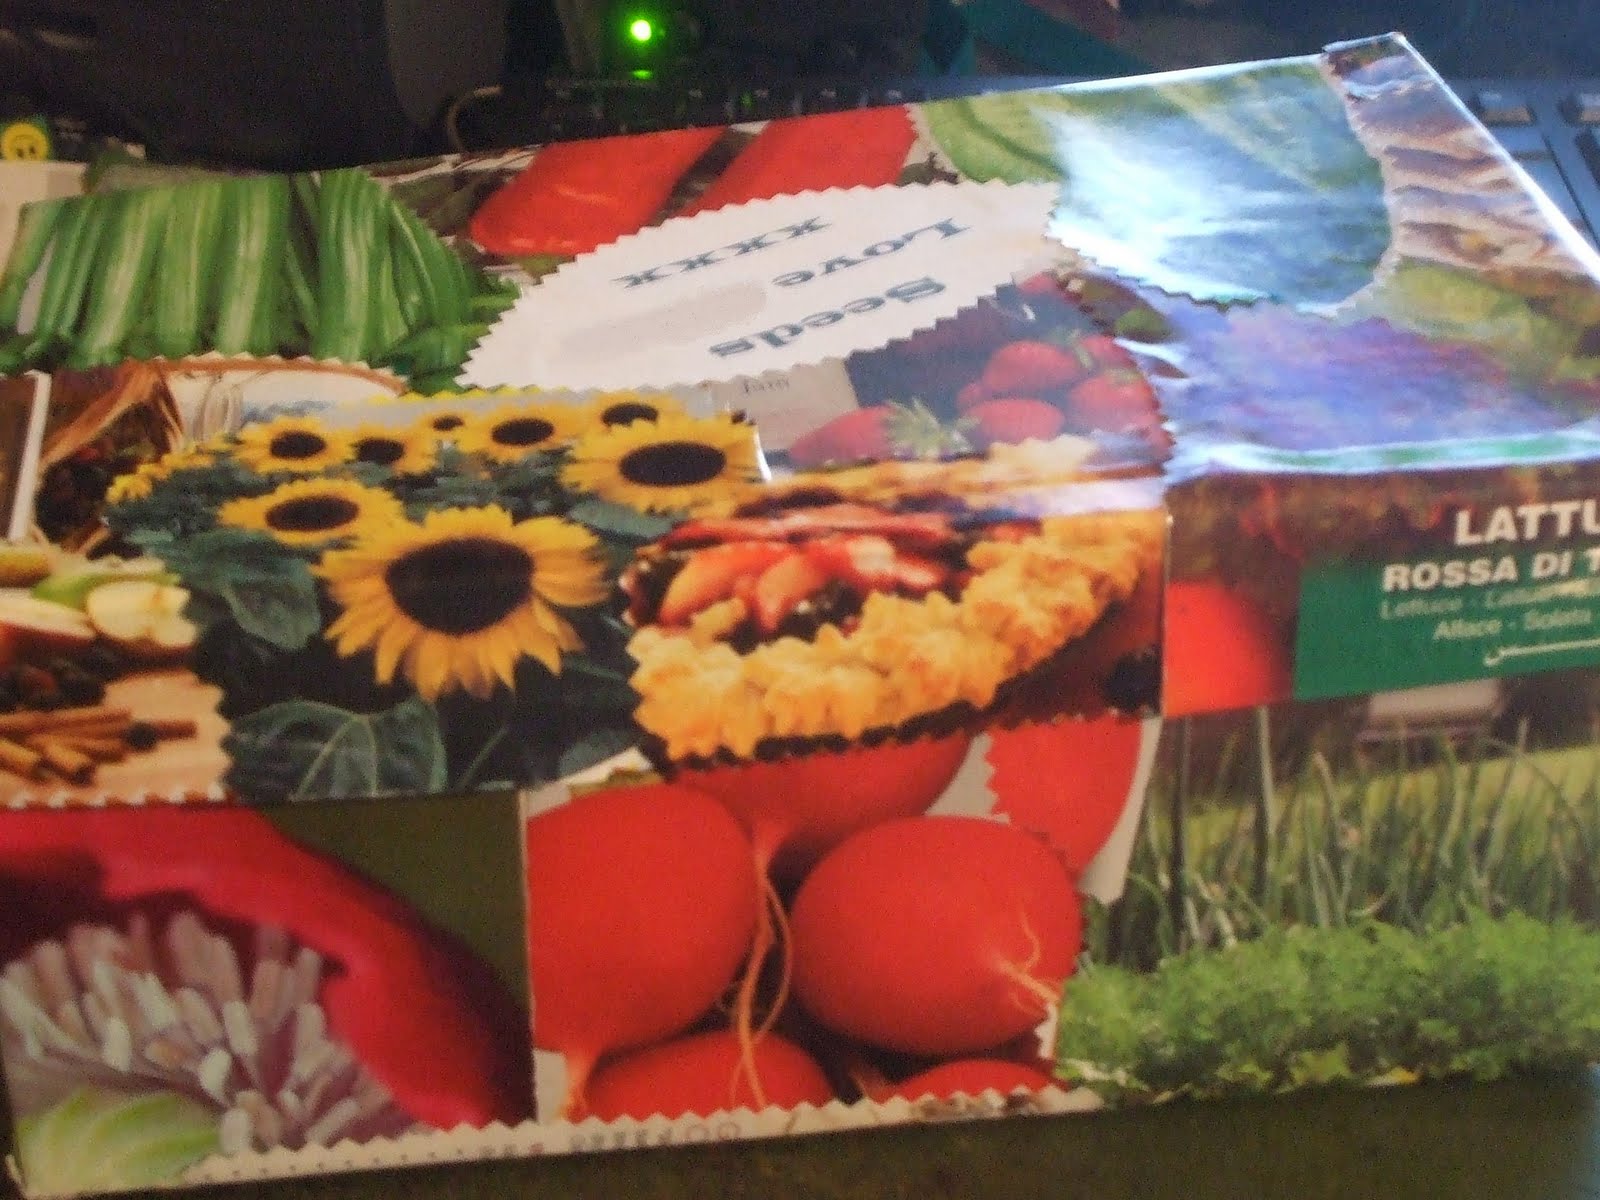
Over the last few weeks we have been gathering the seeds from our flowers and veg ready for use next year. This is something the gardeners used to do a lot but in this “must buy” society is something you don’t hear about that often any more. So far we have several packets drying out and apart from being in brown bags or envelopes haven’t done much with them. Cue the need for a box to put them in. Now we could have just got a box and that be that but Littleun said he fancied making one for his grandfather too so we have come up with an idea for cheep but meaningful gifts. A seed box with home-grown seeds.

You will need,

A shoe box
Pictures from mag’s, papers, seed envelopes etc of flowers, veg or anything you can think of that you would associate with gardens.
Glue
Scissors
Sticky backed plastic
Seeds, envelopes and pictures

Cut out the pictures in non-uniform shapes. Glue onto the lid and the base, cover with the plastic so all smooth and slightly water-drip proof. I have added a couple of recipes that we love doing jams and chutney.

With the seeds we have split them and decorated each envelope with pictures of the plants to show what is inside them ready to add to the box.
Simple but effective little gift for the Littleuns to make.

Tuesday, 3 August 2010

Make yourself a ladybird hotel

One of the things that I have had problems with in the allotment is aphids. By the bucket load they devour my runner beans. After doing research I knew I didn’t want to go down the pesticide route but rather encourage natural predators in the form of rather beautiful ladybirds. We have had a few and as I wanted them to stay, I looked about for a ladybird house to see if they would nest and hibernate nearby so that next year I would be onto a winner. But the prices of these houses were quite a way out of my reach so I thought I’d make one. It is something Littleun can join in with and I can use up all those broken canes at the same time.

To make you will need:
An old 2ltr bottle
Broken canes cut into short lengths
Dried grass stems
Rough string/thin rope
Glue gun

Cut the top of your bottle so that the bottom is the same-ish length as your shortened canes. Glue on the inside the grass stems creating a carpet appearance around the perimeter.
When dry fill the middle gap with lots of the canes so it is tight, if you have a wonky area then put a few more of the stems to fill it, but do remember to leave enough gaps for the bugs to crawl into.
When they are fixed tight, around the outside of the bottle glue more of the canes. This protects the bottle and also gives some extra hidey holes for the ladybirds. Finally tie your rough string/thin rope around the outside so you can hang at a slight downwards angle (don’t want water getting inside).

When the house is made hang near the vegetation that you have problems with and make sure you have sited it in a warm, sunny, sheltered position, out of prevailing winds and close to vegetation. The hanging bug house can be hung from trees, arches or pergolas. If you want to make it a wall house then the wall bug houses can be hung on a fence or wall.

Friday, 4 June 2010

Alban Heruin/Litha handprints and dials

With the longest day coming soon I have been thinking of things that Littleun could do. One of the simplest was a handprint sun for Littleun to have in the window. We basically have yellow and orange paint, cover our hands and make a sun; it’s very simple but looks quite funky. Unfortunately this meant that not only the paper got covered as we turned it in to a fun game to try and print each other with it!
"human" sundial!
The other thing we are going to do now we have our patch is go for a walk along the beach, choose a few largish stones and then go up to the allotment, placing the stones out in a semi-circle we can make our own sundial so that we will always know the time without the need for a modern intrusive clock or alarm, plus it will be a gentle reminder of the turning year.

Thursday, 22 April 2010

Stained glass Greenman


I love the way light plays on glass but am incapable of making stained glass as its such a tricky thing for a beginner like me. So baring that in mind and knowing Littleuns joy of all things Greenman I set of to come up with an alternative. This is it: A tissue paper “glass” which has a similar affect but is so much safer to do and Littleun can join in.

If you want to do one then you will need:

A2 size white card
Craft knife
Green tissues or cellophanes
Glue
Marker pen

Cut the card into 2 equal halves. Draw your Greenman design on one. Attach with clips the second bit of card behind the first.

Using the craft knife cut out areas inside the marked lines so that you can still see the lines clearly (will look a bit like the lead in a window after).


Remove second card when all cut out, turn the marked one over and start to glue the different bits of tissue/cellophane in place. When finished glue the backing card on.


Turn it over and trace the lines so that when you look at the Greenman from either side you will see the pattern. Hang where you will catch the light.

Sunday, 18 April 2010

Making your own Greenman


Littleun loves images of the Greenman and as Beltane isn’t far off we thought we give a go at making our own. All we used was some air drying clay, strong florist wire, leaf-shape cutter and different paints.

Roll out a circle of clay, press down to form base, leaving it to look like a mini hill. Pinch middle into a nose shape and eyebrows. With pencil make two small holes for the eyes, a mouth and nostrils.

Push the small bit of wire into the back to form a hoop which, when dry, you can hang the Greenman with.

Take leaf cutter and cut out leaves. Place leaves around the face in a pattern you like, attach using water and pressure.

When happy leave to dry for at least 48 hours.

Mix paints to form the shades of green you like and paint. Again leave to dry. When finished hang where-ever you like.

Thursday, 4 March 2010

We made Eostre Eggs

I saw in a local shop some lovely little Eostre decorations, Hares, mini eggs etc. Littleun jumped on them with a wicked little smile and asked if we could do the eggs again this year. So if like us you want to make the biggest mess you possibly can, whilst having a laugh you will need the following:

Eggs, blown (or make a small hole then cover with ribbon)
Ribbons
Paints
Decorating bits, sequins, mini hares
Newspaper
Blow the eggs to remove the yolk and white (have scrambled egg for breakie)
Choose what paint colours you’d like and paint on first layer, then second
When dry stick on decorations
Thread through the ribbons and hang.


Simple really, though why it means I’ll have to clean up half the front room
of paint I’m not sure, also hand print on newly decorated wall!

Attempting an egg wreath tomorrow....
ps sorry about the awful layout on this post, blogger seems to be having a mind of its own today!

Thursday, 25 February 2010

Seeds galore

What do you do when its 2 hours to go before you take Littleun out to meet his friends and he is bored? Plant seeds of course. We planted three lots of seeds, a cress caterpillar, mixed salad beans and indoor tomatoes. Littleun really enjoyed making his caterpillar out of empty egg boxes, though the cotton wool was a bit annoying when wet as he kept trying to decorate the ceiling with it, a trick I thought he wouldn’t learn until the science classes at senior school! If you would like to try the cress caterpillar you will need:


Empty egg box
Cotton wool
Cress seeds
Googly eyes
Green pipe cleaner
Glue


Cut egg box into sections, glue each part together in a wiggly line. Glue the eyes on and make two slits for the pipe cleaner. Dampen the cotton wool and put a bit in each section, sprinkle the seeds on top. Keep damp over the time and put near sunshine. Easy and fun.


The tomato set we got from our supermarket, they have started a pocket money range to encourage children into gardening. Well that was the thought but Littleun wanted so many sets that I ended up paying and the pocket money was spent elsewhere!


The lilies that we planted at Imbolc are doing well too. Three have come through out of the five though two are stronger.


Sunday, 31 January 2010

Our Imbolc Fun days

I’ve had fun these last few days where I have been able to pay complete attention for once to Littleun. We’ve done so much. Gone to the park to feed the birds, turned out the squirrels were hungry too, made our Imbolc crown for Littleun to wear and the one for our altar, made Imbolc snowflake biscuits so we could test that they worked (my excuse anyhow) and Littleun came up with an idea that was all his own work. Whilst moving the biscuits I asked him why he was breaking them in half, his reply and I kid you not was “to let winter go mummy” the thought apparently was that if he broke the biscuits then winter would be free for spring to come. Think he might be taking in what I tell him more than I give him credit for! We’ve even got a little ahead of ourselves and made his Beltane mask, just couldn’t resist trying out the ideas on The Cauldrons site.


I’ve now started on preparing the food for our Imbolc feast. We are having simple but homely fare, Roast leg of Mutton with winter vegetables, Crepe suzette with homemade ice cream, cheese and Littleuns biscuits for later plus non-alcoholic mead.

Non-alcoholic Mead

4 cups spring water
1 cup honey
1/2 tsp. nutmeg
1/2 tsp. ginger
1/4 teaspoon cinnamon
1 lemon, sliced
1 orange, sliced

Bring the water, honey, nutmeg, ginger and cinnamon to a boil in a non-metallic pan. Stir until honey is dissolved; heaviness should disappear from bottom of the pan. Use wooden spoon to skim off skin that forms at top of brew. Add lemon and orange slices, squeezing as they are placed in the pan. Cool completely; strain. Store in bottle in refrigerator.

Thursday, 28 January 2010

The Cauldron

Ok, so I know I said I was taking some time off to be with Littleun but last night whilst trying to come up with things to do with him I ran across this website called The Cauldron and just had to share it with you. In one word “brilliant”. It has a Greenman pattern for both a mask and an appliqué, something I’ve been hunting for a while (I’m no good with drawing things myself!) Imbolc paper chains, Recipes and Games to name just a few. We’re going to be entertained for ages! Go and have a look, you’ll love it.


Saturday, 16 January 2010

Imbolc Crafts: Metal flakes

Brighid is the Goddess of many things, including blacksmithing. Now this is an impractical, downright dodgy thing to try if you’ve got Littleuns so I was thinking how can I combine metal and kids safely. I came up with using tinfoil. I was going to get him to roll some into shapes and make things but whilst I was getting it all ready he sat there with a pencil and started to draw on the foil. So our plans changed a bit. Instead we’ve made metal snowflakes.

It’s quite simple really, you will need:
Tin/aluminium foil
Pencil or similar
Some scissors
Ribbon
Soft area to work

Cut out circles of the foil in different sizes.
Drawn on one side patterns to look like snowflakes, this will leave an embossed area once you turn it over. Pinch the points where you want to give“sharpness” to the look.
Pearce a hole in a point and thread the ribbon. Then hang in the window, off the ceiling, the banisters, in fact if you are like Littleun, anywhere!

Another type of “Metal” snowflake we have done is with glitter and glue guns. A bit tricky for the Littleun to use the gun so I did that part but the rest was messy fun so he did that!


You will need:
Glue gun
Plastic cutting board/ flexible if you have one
Silver glitter
Ribbon


On your board use the gun to “draw” out a snowflake shape. You need to be quick so it doesn’t cool down too fast. As soon as you have, get the Littleuns to cover the shape with the glitter. Attach the ribbon with a bit more glue. Leave until hard and set then peel off board (that's why a flexible one is slightly easier) and hang in windows etc.

Friday, 15 January 2010

Imbolc Crafts: Brighid’s Cross

The first of the Imbolc crafts that we are trying (other than the Ice candle) is a cross. Littleun is a bit young so I thought he might find this fiddly but in fact the calm repetitive method seemed to appeal to him and after a few attempts was soon well away. We did a crazy amount of these so will be giving some to friends who hopefully will like them! Again I have used about.com for the following information, so many thanks to them.

The cross has long been a symbol of Brighid, the Irish goddess who presides over hearth and home. In some legends, the girl who became St. Bridget wove the first of these crosses as she explained Christianity to her father, a Pictish chieftain. In other stories, the cross is not a cross at all, but a wheel of fire, which explains why it's a bit off-centre in appearance. In parts of Ireland, Brighid is known as a goddess of the crossroads, and this symbol represents the place where two worlds meet, and the year is at a crossroads between light and dark.


A Brighid's Cross can be purchased in many Irish craft shops or at festivals, but it's actually pretty easy to make your own. You can incorporate the creation of your Brighid's Cross into your Imbolc rituals, use it as a meditative exercise, or just put one together with your kids as a fun craft activity.

To make your Brighid's Cross, you'll need straw, reeds, or construction paper -- if you're using plant material like straw or reeds, you'll want to soak it overnight so it's pliable when you go to make your Cross. Your end result will be about the length of one piece of your material -- in other words, a bundle of 12" reeds will yield a Brighid's Cross just slightly longer than 12".
** Note: for a super-easy, kid-friendly edition of this project, use pipe cleaners.

To begin, you'll form a base for your Cross by bending two pieces of straw in their middles to create a pair of loops -- in fact, you'll do this with each piece as you make your Cross. Link the two pieces together at their centres, as shown in Figure 1.

Next, turn these two pieces so they lie flat, and at a right angle to one another, as shown in Figure 2. This basic two-piece unit is the base for the rest of the Cross, and it's the only time you'll have two pieces hooked together in the middles like this.

Next, bend a third piece of straw in half, and loop it over one of your two base pieces, as indicated in Figure 3. Both legs of the loop in the new piece will pass over both legs of the base piece. Pull this third piece tight to hold it in place.


Take a fourth piece, and bend it in half as you've done with the others. Loop this one over the legs of the piece you added in Step 3. You should now have four pieces, each pointing in a different direction, as shown in Figure 4.

Finally, you'll continue looping pieces over one another (see Figure 5) as you did in the last step, until your cross reaches the size you want. Each piece loops over the previous one. When you're all done, use a piece of string, ribbon, or even another bit of straw to secure the four ends. Trim off excess pieces.

EDIT: I've just posted this and then gone on to read other folks blogs, Pagan Dad has also posted about the crosses today, that'll teach me to read others before blogging mine, lol!

Wednesday, 13 January 2010

Celtic Gods and Goddesses; Brighid

If like me you are still learning and therefore may be a little confused about the relations between the Gods and Goddesses, you may find the "timeless myths" link for the Gods and Goddesses trees useful.


With Imbolc around the corner I’ve centred my current studies on Brighid, There is an abundance of information on this Goddesses and it’s difficult to pick a point at which to start! She is the daughter of Dagda and sister to others, including Midhir, who I’ve briefly mentioned previously. She is thought to have two others sisters, also called Brighid and as such is a triple Goddess and finally mother to Ruadán. She is the goddess of all things perceived to be of relatively high dimensions such as high-rising flames, highlands, hill-forts and upland areas; and of activities and states conceived as psychologically lofty and elevated, such as wisdom, excellence, perfection, high intelligence, poetic eloquence, craftsmanship (especially blacksmithing), healing ability, druidic knowledge and skill in warfare. Over the next few posts I hope to be able to share Imbolc related crafts which you can do with your Littleuns and place, if you’d like to, on your Altar.

Tuesday, 12 January 2010

Imbolc Crafts: Ice Candles

Imbolc is fast advancing and with this everlasting snow we seem to be getting, I for one can’t wait. I normally love winter, its clean cold crispness which eventually moves away to reveal new life with buds of snowdrops peaking through the ground is a lovely sight. But to be fair, I have had enough this year. I’m a wimp I know and I’ve been done in by it all. The walking constantly last week saw me end up with a horrible cough and cold, fast on the heels of the one I’d just got rid of, and a wrenched knee. Now swollen and stiff making life a little tricky in a house which is 3 levels! So I have been searching for fun things to do in the warm with Littleun. I came across this candle idea and we have given it a try, not as warm in the preparations as you’d have thought but a good afternoon anyway. Just be warned it can get a little messy.


Ice candles are a lot of fun and easy to make during the winter months. Since February is traditionally a snow-filled time, at least in the northern hemisphere, why not make some ice candles to celebrate Imbolc, which is a day of candles and light?
You'll need the following:
· Ice
· Paraffin wax
· Colour and scent (optional)
· A taper candle
· A cardboard container, like a milk carton
· A double boiler, or two pans


Melt the paraffin wax in the double boiler. Make sure that the wax is never placed directly over the heat, or you could end up with a fire. While the wax is melting, you can prepare your candle mould. If you want to add colour or scent to your candle, this is the time to add it to the melted wax.


Place the taper candle into the centre of the cardboard carton. Fill the carton with ice, packing them loosely in around the taper candle. Use small chunks of ice - if they're too large, your candle will be nothing but big holes.


Once the wax has melted completely, pour it into the container carefully, making sure that it goes around the ice evenly. As the hot wax pours in, it will melt the ice, leaving small holes in the candle. Allow the candle to cool, and then poke a hole in the bottom of the cardboard carton so the melted water can drain out (it's a good idea to do this over a sink). Let the candle sit overnight so the wax can harden completely, and in the morning, peel back the entire cardboard container. You'll have a complete ice candle, which you can use in ritual or for decoration.


Patti Wigington, About.com Guide

Monday, 4 January 2010

Pagan Parenting ideas

It’s quite difficult sometimes for me as a newbie pagan to know how to do things with Littleun. Some of it is easy, just follow your heart and reinforce the need for respect and kindness. But some off it can be tricky. How much do I tell him, I teach him about all faiths, after all as I’ve mention previously he should be free to find his own way.

Recently I have stumbled across various WebPages which have helped. Some are about the spiritual aspects and some like Pooka-pages are about a bit of spiritual and a lot of craft. I know it centres on Witches and that we aren't particularly Wiccan but I find it a helpful place and full of drawings and stories which the Littleun loves. If you have time, take a wander over, I think it’s worth the visit...